Design Patterns in Unity3D #4 - Model-View-Controller (MVC)
- Nov 25, 2017
- 2 min read
Hello everyone !! In this blog we will explore yet another software design pattern that is commonly used in games programming, Model-View-Controller or MVC for short.
This design pattern basically divides the entire application, in this case the game, into three part that is related to each other. Those 3 parts are, as its name states, the model, view, and the controller.
1. Model - Object that contains information about the data, state and behaviour of the game
2. View - Object that displays all of the Model's data to the user
3. Controller - Object that receives any input from the user and controls the Model based on that input and will notify the View whenever there are changes that happened in the Model.
Let's see one of the implementation of this pattern in game programming. We will make a simple example in Unity where we have a Player, a destination point, and a text that displays the distance between the Player and the destination.
Create a C# script called Player. The Player class will act as the model. It contains information about the its destination. It can move and can calculate how much is the distance between itself and its destination.

Now that we've done with the Player, we will move to the View. Create a new C# script called PlayerView. PlayerView gets the information of the Player and display those information by using Unity Text UI component. It also can update the display when there are changes made in the Player's data by the PlayerController class, which we will work on it after this. In this implementation the View is used to display the distance between the Player and the Player's destination.

Now that we have done with the View, we will create the Controller class. Create a new C# script named PlayerController. PlayerController will receive keyboard input from the player to control the Player and at the same time it notifies the PlayerView that now the Player is in a different position, so that the PlayerView can ask Player to recalculate the distance between the Player and the Player's destination, and then the new distance will be used to update the display.

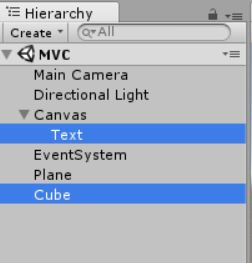
We have done with the code. Now go back to the Unity Editor. Create 2 new objects, a Text UI and a Cube. The Text UI will act as the PlayerView and the Cube will be Player's destination.

In the Text UI, attach the PlayerView script.

Next, attach both Player and PlayerController into the camera. We are going to make FPS character here. Then, assign the Cube to be the destination transform in the Player script. Then assign itself (the camera game object) to the PlayerModel object in the PlayerController, and assign the Text UI as the PlayerView object.

Now click play. Now the Player can move if we press the W, A, S, and/or D and the Text UI will update the display of the distance to the destination whenever the Player changes its position.
That is all for the tutorial. Hope this helps all of you who read this.


Comments